Showing posts with label beginner crochet pattern. Show all posts

Friday, November 4, 2022

Christmas Garland

 A Free Crochet Pattern


It's been a long while since I have offered a free pattern on the blog. I thought this one perfectly fit the bill to be a free pattern so here we are. 

The first Christmas that I had my oldest, I wanted to have the perfect tree, but when you are on a limited budget like we were at the time expectations are often not met. I was feeling a little sad about it, and my mom encouraged me to just find a color theme and just make my own decorations with what I had. I ended up having some red and green fabric that I ripped up into strips and made ribbons with them. We had fake poinsettias that I took apart and put those on the tree. And it really ended up being a cute little tree. After that first Christmas, I always try and make something to add to the tree. 

This year I decided on making some garland. I took a little inspiration from some garland that I found for $1.00 after Christmas last year. I wanted it to be mostly neutral with a little pop of color. 

Where to find the pattern


Below is the free pattern instructions. It's written a little different than how I usually write patterns but for this pattern I thought steps would be better than rows, I have added a picture for each step to help along. 

If you find this pattern helpful and you would like a copy to have on hand always. I have the PDF Available in my Ravelry shop, for a small fee. You can find the paid option for this pattern at the Link below: https://www.ravelry.com/patterns/library/christmas-garland-23
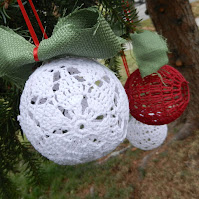


Christmas Garland


Designer: Julia Schwartz

Yarn: Lion Brand Re-tweed: size 4, 40% wool, 40% acrylic, 20% polyester, 100g/202 yards color used: elmwood

Hook: E/00 3.5mm (If you find using such a small hook, you can go up a couple of sizes for the stitches and use the smaller hook for adding the bead

Notions: 70-80 red 16mm wooden beads

Size: Appox. 30 ft./ 9.2m

Gauge: not needed for this pattern

Copyright: Julia Schwartz Do not reproduce, copy, distribute, or sell this pattern without permission of the designer. This pattern must not be translated, reproduced, or circulated in another language without prior consent. If you have questions about this pattern please contact me through e-mail.

Instructions


 Step 1: Ch 25


Step 2: Sc in 2nd st from the hook, using a ch st for each of the next sts, hdc, 2 dc, 2 tr, dc, ch 1, sl st. 


Step 3: Insert hook into bead, yo, and pull loop through the bead


 Step 4: Ch st to secure the bead. 


Step 5: Ch 8 sts


Step 6: Sc in 2nd st from the hook, using a ch st for each of the next sts, hdc, 2 dc, 2 tr, dc, ch 1, sl st into the ch at the top of the bead. 


Continue repeating steps 1-6

When finished ch 25 and make a knot, and weave in your ends. 


More Christmas Patterns for You

A Poinsettia Pattern
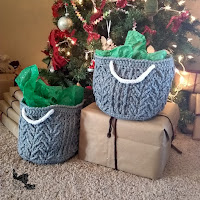
 
Winthrop Basket


Social Media

I hope you enjoyed that free crochet pattern. If you really love this pattern make sure you are following me on my social media or sign up for my news letter so you won't miss out on future patterns and sales!
Just click the link below to find my quick links page to take you to all my social media pages and sign-up form for the news letter.


Tuesday, April 23, 2019

Camden Blanket

A  Free Beginner Friendly Crochet Pattern


I love making baby things in the spring. Maybe it has something to do with new life springing up everywhere in nature, I just have to be a part of it too somehow. Last month my church had a baby shower for the City Union Mission. 

It was not a typical baby shower. For one we had no idea who the baby was, and there was no expectant mother there to greet us. The City Union Mission had a need for more baby items, so we answered the call in a small way. On Doughnut Sunday we gathered together all the baby things we collected throughout the month and we got to gush over all the little things that fit babies. When everyone one finished Oooo and awing one of the ladies took all the things up to where they needed to go. This blanket was my contribution to the baby items.  

This pattern is a really easy pattern that is great to do while watching a show, or you just need something easy for a change. It was so easy I was surprised that I couldn't find any other patterns like it on Ravelry. Because of that I have typed up the pattern to share with you. 


Stay Connected!


If you like this pattern and you don't want to miss the next one be sure to subscribe to Designs by Diligence to get notified when new patterns come out. The only time you will get an email is when a new post happens on the blog, usually on Tuesday.

You can also follow me through my social media sites. I love sharing sneak peeks, wips, and fiber arts news and projects.

Facebook

Instagram

Pinterest


Where can I get this pattern


This is a free Pattern right here on the blog. Just keep scrolling down to find the pattern. If you would like an ads free, printer friendly PDF version I have them for sale in my Ravelry Shop for 3.00.
<----->BUY NOW<---->


Designer: Julia Schwartz

Yarn: Bernat Softee Baby 100% acrylic, 4.25 oz./ 120 g., 310 yrds/ 283 m, 4 balls needed (3 marls, 1 solid)

Hook: 4.00 mm, US G/6

Notions: tapestry needle

Size: 40 by 40 inches Gauge: 16 sts X 19 = 4 inches

Stitches Used: Single crochet (sc), Chain (ch), Slip Stitch (sl st), Skip Stitch (sk st), Single crochet 2 stitches together (sc2tog), Single crochet 3 stitches together (sc3tog)

Notes:

  • This pattern is worked on a diagonal so the first half looks like a triangle and then the second half is closing the triangle into a square. 

Copyright: Julia Schwartz. Do not reproduce, copy, distribute, or sell this pattern without permission of the designer. This pattern must not be translated, reproduced, or circulated in another language without prior consent. If you have questions about this pattern please contact Julia.diligence@gmail.com.


Pattern Instructions

Increasing Rows

Row 1: Ch 2, make 3 sc in the second ch from the hook. (3 sc made)

Row 2: Ch 1, turn, 2 sc in the first st, ch 1, sk 1 st, 2 sc in the last st. (4 sc made, 1 ch made)

Row 3: Ch 1, turn, 2 sc in the first st, {ch 1, sk 1 st, sc in the next ch}, Repeat {to} to the last 2 stitches, ch 1, sk 1 st, 2 sc in the last st. (2 stitch increase every row) 

Keep repeating row 3 until the triangle is 36 inches or until you have reached your desired width. 

Decreasing Rows

Row 1: Ch 1, turn, sc in the first st, sc2tog in the next st and ch, {ch 1, sk 1 st, sc in the next ch}, repeat {to} to the last 4 sts, ch 1, sk 1 st, sc2tog in the next ch and sc, sc in the last st. (2 decreases in each row)

Keep repeating row 1 until there are only 5 sts left

Row 2: Ch 1, turn, sc in the first st, sc3tog in the next 3 sts, sc in the last st

Row 3: Ch 1, turn, sc3tog in the last 3 sts. 

Finish off 

Edging

Row 1: Attaching the yarn at any corner, ch 1, {(sc, ch 1, sc) in the corner st, sc in each st to the next corner} repeat {to} until the last corner, sl st into the first st.

Row 2: Sl st into the corner ch st, {(sc, ch 1, sc) in the same corner st, ch 1, sk 1 st, sc in the next st} repeat {to} to the last corner, sl st into the first st. 

Continue repeating row 2 until you have your desired width of edging. 

Last row: Ch 1, reverse sc in each st, sl st in first st.

Finish off.


Weave in your ends.

More Crochet Patterns You Will Love

Double Brimmed Hat

Infant Hat in Simple Cables

Pin For Later!


Monday, October 1, 2018

Becca Kid's Sweater


A Free Crochet Pattern 


A while back did any of you take advantage of the Lionbrand mystery boxes? I did. I got one of the light boxes. When I saw the ice cream yarn I knew just what I wanted to do with it. Make a sweater for my daughter. I ended up having just the right amount of yarn, 3 skeins. The speckles are just the right amount to make it more interesting. I always love something with a bit of texture, and I think this stitch pattern is perfect.

I wanted a sweater that was really easy to construct, and seamless on the sides. The only seams in this whole sweater are at the shoulders, and the top of the hood. Because there is not a lot of seaming this sweater works up quick and it is easy to adjust the sizing to just how you want it.

I also want to remind you that there is a stitch tutorial for the stitch used in this sweater you can find it here: lateral braid stitch.


Where can I get this Pattern?


This is a free crochet pattern found right here on Designs by Diligence. Just keep scrolling down to read the pattern. If you would like to purchase an ads free, printer friendly PDF you can through my Ravelry Pattern Store for $3.00
<---------->buy now<---------->
When you purchase this pattern You will get 3 sizes (4-6, 6-8, and 8-10). The blog post below only has the 8 -10 size.

Stay Connected!

If you like this pattern be sure to subscribe to Designs by Diligence to get notified when new patterns come out. The only time you will get an email is when a new post happens on the blog, usually on Tuesday.

You can also follow me through my social media sites. I love sharing sneak peeks, wips, and fiber arts news and projects.
Facebook

Instagram

Pinterest


Designer: Julia Schwartz
Yarn: Lion Brand Ice cream yarn: 100% acrylic, 100g/ 3.5 oz, 390 yrd, 360m, 3 light, color sprinkles sherbet 304 (3 balls needed for size 8-10)
Hook: F/5 3.75mm
Notions: yarn needle
Size: youth large 8- 10 years (32 inch chest circumference, 21 inch length)
If you would like to purchase the small and medium sizes you can HERE!
<---->buy now<------>
Gauge: 15 dc X 8 rows equals 4 X 4 inches
Stitches Used: ch, dc, foundation dc, lateral braid stitch (I made a tutorial for the stitch, just follow the link), sc
Special stitches:
  •  Lateral braid stitch: yarn over, insert your hook right under the v of the stitch you just finished stitching into, and around the post of the next stitch. so it looks like you are straddling both "v's",
    yarn over, pull hook back through the stitches, yarn over, pull through 2 loops, yarn over, pull through 2 loops 

Notes: The pattern is worked from the bottom up.
Copyright:
Julia Schwartz. Do not reproduce, copy, distribute, or sell this pattern without permission of the designer. This pattern must not be translated, reproduced, or circulated in another language without prior consent. If you have questions about this pattern please contact Julia.diligence@gmail.com.


Pattern Instruction


Row 1 (wrong side): Make 119 foundation dc or ch 121, dc in 3rd ch from hook and in each ch for a total of 119 dc.
Row 2 (right side): Ch 3, (counts as first dc here and throughout), turn, 2 dc in the next st, {sk dc, 2 dc in next dc} repeat to last 3 dc, sk 1 dc, dc in each of the last 2 dc. (119 sts)
Row 3: Ch 3, turn, lateral braid st in each dc. (119 sts)
Row 4- Row 27: Repeat rows 2 and 3
do not finish off


Separation of sleeves for right front 

Row 28: Repeat row 2 for a total of 27 stitches. 
Rows 29- 37: Repeat rows 3 and 2. Finishing on a row 3. (27 stitches)
at the end of row 37 finish off. 

Separation of back

Row 28: With right side facing you, skip 5 sts on row 27, ch 3, 2 dc in the next st, {sk dc, 2 dc in next dc} repeat to last 3 dc, sk 1 dc, dc in each of the last 2 dc. (55 sts)

Rows 29-37: Repeat rows 3 and 2.  Finishing on a row 3. (55 stitches)
at the end of row 37 finish off. 

Separation for Left front

Row 28: With right side facing you, skip 5 sts on row 27, ch 3, 2 dc in the next st, {sk dc, 2 dc in next dc} repeat to last 3 dc, sk 1 dc, dc in each of the last 2 dc. (27 sts)

Rows 29-37: Repeat rows 3 and 2. Finishing on a row 3.  (27 stitches)
at the end of row 37 finish off.


Seam Shoulders

With front sides facing each other, fold the front sides in so that they are touching the back piece. See picture for reference. Sew together the top shoulder seams for 13 stitches on each side with a wip stitch.

Sweater Hood

Row 1: Starting with right side facing up, attach yarn at corner of row 37 and ch 3,  (counts as dc), 2 dc in the next st, {sk dc, 2 dc in next dc} repeat {to} t the last 3 sts, sk 1 dc, dc in each of the last 2 dc. (63 sts) Note: Depending on your seams your count might be a little different from mine, and that's okay just so long as you are ending with the last 3 sts the same.

Row 2(wrong side): Ch 3, turn, lateral braid st in each dc. (63 sts)

Row 3: Ch 3,turn, 2 dc in the next st, {sk 1 st, 2 dc in the next st, 1 dc in the next st, 2 dc in the next st} repeat 13 times, sk 1 st, 2 dc in the next st, 1 dc in the next 2 sts,  (77 sts)

Row 4: Repeat row 2 (77 sts)

Row 5: Ch 3, (counts as first dc here and throughout), turn, 2 dc in the next st, {sk dc, 2 dc in next dc} repeat to last 3 dc, sk 1 dc, dc in each of the last 2 dc. (77 sts)

Row 6- 23: Repeat row 4 and 5. (77 sts)

Row 24: Ch 1, turn, fold the row in half and working through both halves of the row, sl st in each of the stitches across for a total of 39 times.

Finish off.


Sleeves (same on both sides)

Row 1 (front side): Attach yarn in the 3rd stitch of the 5n open sts from row 27, ch 1, sc in the same stitch, sc in the next 2 sts, 2 sc in each post of the next 24 sts for a total of 48 sts, sc in the next 2 sts, sl st into the starting sc. (53 sts)

Row 2(wrong side): Ch 3, turn, lateral braid st in each dc, add a lateral braid stitch to starting ch, for an extra st. (54 sts)

Row 3: Ch 3, turn, dc in same sp, (sk 2 sts, 2 dc in the next st) repeat (to), {sk 1 st, 2 dc in the next st} repeat {to} 19 times, sk 2 sts, 2 dc in the next st, sk 2 sts, sl st into the starting st. (50 sts)

Row 4: Ch 3, turn, lateral braid st in each dc, sl st into starting st (50 sts)

Row 5: Ch 3, turn, dc in the same space, sk 2 sts, 2 dc in the next st, {sk 1 st, 2 dc in the next st} repeat {to} 20 times, sk 2 sts, sl st into starting st. (48 sts)

Row 6: Repeat row 4 (48 sts)

Row 7: Ch, 3, turn, dc in the same sp, {sk 1 st, 2 dc in the next st} repeat {to} 21 times, sk 1 st, sl st into starting st. (48 sts)

Row 8: Repeat row 4 (48 sts)

Row 9: Repeat row 7 (48 sts)

Row 10: Repeat row 4

Row 11: Ch 3, turn, dc in the same space, sk 2 sts, 2 dc in the next st, {sk 1 st, 2 dc in the next st} repeat {to} 19 times, sk 2 sts, sl st into starting st. (46 sts)

Row 12- 25: Repeat rows 6 and 7 (46 sts)

Row 26: Repeat row 4 (46 sts)

Row 27: Ch 3, turn, dc in the same space, sk 2 sts, 2 dc in the next st, {sk 1 st, 2 dc in the next st} repeat {to} 18 times, sk 2 sts, sl st into starting st. (44 sts)

Row 28: Repeat row 4 (44 sts)

Row 29: Ch 3, turn, dc in the same space, sk 2 sts, 2 dc in the next st, {sk 1 st, 2 dc in the next st} repeat {to} 17 times, sk 2 sts, sl st into starting st. (42 sts)

Row 30- 34: Repeat rows 6 and 7 (42 sts)

Rows 34- 38: Ch 1, turn, sc in same st and sc in each st, sl st into first st.

Finish off. Repeat on the second sleeve.

Sweater Edging Band

Round 1: Attach yarn at right front corner (with the front side facing up), ch 1, (sc, ch1,  sc) in same st, 2 sc in each st post around the right front, hood and left front, (sc, ch 1, sc) in the corner st, 1 sc in each st of beginning row, sl st in beg. sc.

Round 2-5: Sc in each sc, (sc, ch 1, sc) in each ch st.

Finish off. Weave in your ends.

More Crochet Patterns You Will Love


vintage nursery blanket

girl power backpack

Pin for Later!


Monday, June 4, 2018

Summer Festival Clutch

A Free Beginner Friendly Crochet Pattern 


I've got a great beginner friendly pattern for you all today. The only stitches in this clutch are sc and sl st. It doesn't get easier than that. I have been noticing a trend for the summer of circular clutches and baskets for hand bags. I love the artisan look that is being developed in fashion as of late. So here is my take on the trend. 

This is a little clutch is just the right size to have your bare essentials. My girls love it to put their little special things in. I used Bernat Handicrafter for the yarn. I love the color that I chose. It makes it look more like a basket and I finished it with a simple embroidery design. of long stitches to make the flower. I added some lazy daisy stitches for the leaves in a secondary color. 


Stay Connected


If you like this pattern be sure to subscribe to Designs by Diligence to get notified when new patterns come out. The only time you will get an email is when a new post happens on the blog, usually on Tuesday.

You can also follow me through my social media sites. I love sharing sneak peeks, wips, and fiber art news and projects.
Facebook
Instagram
Pinterest


Designer: Julia Schwartz

Yarn: Bernat Handicrafter variegates cotton yarn color: Sonoma Print. 400g / 14 oz, 650 meters / 710 yards

Hook: H/8 5mm

Notions: yarn needle, Button, Sewing thread, 2 colors of embroidery thread

Size: 17 inches circumference 

Gauge: 13 sc and 14 rows with sc st. 

Stitches Used: sc, sl st

Notes: The clutch is made by making the front and back peices, and the side piece is wip stitched to both front and back to make the wrist strap. 

Copyright:
Julia Schwartz. Do not reproduce, copy, distribute, or sell this pattern without permission of the designer. This pattern must not be translated, reproduced, or circulated in another language without prior consent. If you have questions about this pattern please contact Julia.diligence@gmail.com.


Where You Can Get the Pattern

This is a free crochet pattern on the blog. Just keep scrolling down to see this pattern. By having it free on the blog I am able to promote the pattern more and share it with more people. I also feel that I bring some trust to my readers who can read through the pattern before they decide if they want to purchase the pattern.

If you would like to purchase this pattern that is ads free and printer friendly, it is available for Download through my Ravelry Store For $3.00.

<-------->buy now <-------->


Pattern Instruction 


Front and back of bag (make two circles)


Round 1: With an adjustable loop, make 6 sc in the loop, pull the loop tight and sl st into beginning sc. (6sc)
Round 2: Ch 1, 2 sc in the same st, {2 sc in the next sc} Repeat {to} 4 times, sl st into beginning sc. (12 sc)
Round 3: Ch 1, sc in same st,  2 sc in the next sc, {sc in the next sc, 2 sc in the next sc} Repeat {to} 5 times, sl st into beginning sc. (18 sc)
Round 4: Ch 1, sc in the same st, sc in next st, 2 sc in the next st, {1 sc in each of the next 2 sc, 2 sc in the next sc}, Repeat {to} 5 times, sl st into beginning sc. (24 sc)
Round 5: Ch 1, sc in the same st, sc in next 2 sts, 2 sc in the next st, {1 sc in each of the next 3 sc, 2 sc in the next sc}, Repeat {to} 5 times, sl st into beginning sc. (30 sc)
Round 6: Ch 1, sc in the same st, sc in next 3 sts, 2 sc in the next st, {1 sc in each of the next 4 sc, 2 sc in the next sc}, Repeat {to} 5 times, sl st into beginning sc. (36 sc)
Round 7: Ch 1, sc in the same st, sc in next 4 sts, 2 sc in the next st, {1 sc in each of the next 5 sc, 2 sc in the next sc}, Repeat {to} 5 times, sl st into beginning sc. (42 sc)
Round 8: Ch 1, sc in the same st, sc in next 5 sts, 2 sc in the next st, {1 sc in each of the next 6 sc, 2 sc in the next sc}, Repeat {to} 5 times, sl st into beginning sc. (48 sc)
Round 9: Ch 1, sc in the same st, sc in next 6 sts, 2 sc in the next st, {1 sc in each of the next 7 sc, 2 sc in the next sc}, Repeat {to} 5 times, sl st into beginning sc. (54 sc)
Round 10: Ch 1, sc in the same st, sc in next 7 st, 2 sc in the next st, {1 sc in each of the next 8 sc, 2 sc in the next sc}, Repeat {to} 5 times, sl st into beginning sc. (60 sc)
Round 11: Ch 1, sc in each st around, sl st into beginning sc. (60 sc) 
Finnish off

Side and Wrist strap

Row 1: Ch 7, sc in the second ch from hook, sc in each ch. (6 sc)
Row 2: Ch 1, turn, sc in each st. (6 sc) 
Repeat row 2 for a total of 75 rows or until it measures 20 inches 
Finish off

Assembling the bag

  • For the front of the bag, embellish with embroidery and add a button to the to the center.
  • Wip stitch the first 45 sts of the front piece with the first 45 rows of the side and wrist strap. 
  • Repeat with the back side. 
  • Fold the left over rows of the side and sew it together to form the wrist strap.
  • For button flap, On the back, find the middle sc of unused sts, attach yarn and ch 20, sl st into starting sc, finish off. 
  • Weave your ends

More Patterns You Will Love


Pin For Later!


Monday, July 10, 2017

Crafty Containers

A Free Crochet Pattern


 Do you need a simple storage solution for your desk or shelves? This is a very easy project that can be done in a short amount of time. It uses an oatmeal container and some simple crocheting skills. They are sturdy and once you are done you cannot tell that they used to take up space in your pantry!

The Crafty Containers are another pattern that I am moving over from Crochetvolution. For this project I knew I wanted to make new samples and pictures. I chose bright colors in worsted cotton this time.

I still use these containers after 3 years, so it was time for an update. They sit at my sewing desk. The larger container is perfect for my Granny's old knitting needles. And the smaller container is perfect for hooks and loose notions.

Don't forget to add this pattern to your favorites on Ravelry.

Difficulty: Easy
Size: 18 oz oatmeal container cut to the size you would like
Materials:
  • Any 4-ply worsted weight yarn in 2 colors 
  • H/8 (5.00mm size) hook
  • A cleaned out 18 oz oatmeal container
Gauge: After the first four rounds it should be the same size as the bottom of the container

Note: You can cut your container down to a size that you like but make sure you cut it down by inches. Also this will affect how many rows you will crochet.


Directions:

Outer layer

Round 1: With Color1, ch 4, make 9 dc in the 4th ch (the rest of the chs form the first dc) from hook, sl st into beg dc for a total of 10 dc.

Round 2: Ch 3 (counts as first dc here and throughout), dc in the same st, {make 2 dc in the next dc.} Repeat from *{to} 8 more times, sl st into beg st. (20dc)

Round 3: Ch 3, {make 2 dc in the next st, 1 dc in the next st.} Repeat from {to} 8 times, make 2 dc in last st, sl st in beg st. (30dc)

Round 4: Ch 1, sc in the same st, sc in the next st, make 2 sc in the next st. {Sc in the next 2 sts, make 2 sc in the next st}. Repeat from {to} 8 times, sl st into beg sc. (40 sc)

Round 5: Working in back loops only, ch 3. Dc in each st around, sl st into beg dc. (40 dc)

Rounds 6-17 (or till you reach the top of the container): Ch 3; dc in each st around, sl st into beg dc. (40 dc) At the end of your last row, finish off.

Inner layer

With Color 2, repeat Rnds 1-17 of Outer Layer (do not finish off). Insert the inner layer into the container and slip the outer layer over the container. Match up your edges, and crochet the two layers together in the next row.

Round 18: Ch 1, sc in the same st. Sc in each st around, sl st into beg sc. (40 sc)

Round 19: Ch 1, sc in the same st, sc in the next st. Sk 2 sc, ch 4. {Sc in the next 2 sc, sk 2 sc, ch 4}. Repeat from {to} 8 times, sl st into beg sc. (20 sc and 10 ch-sp)

Round 20: Sl st into the next sc and into the ch-sp, ch 1. {(Sc, hdc, dc, hdc, sc) into the ch-sp}. Repeat from {to} 9 times, sl st into beg sc. (10 petals)

Round 21: Sl st into the next 2 sts, ch 1. {Sc in the dc, ch 4}. Repeat from  {to} 9 times, sl st into the beg sc. (10 ch-sp)

Round 22: Sl st into the ch-sp, ch 1. {(Sc, hdc, dc, ch 3, sl st into dc (picot made), hdc, sc) into the ch-sp}. Repeat from {to} 9 times, sl st into beg sc. (10 petals with picots) Finish off and weave in your ends, fold edge down over outside of container.


More Crochet Patterns You Will Love 

Bullion Butterfly Beanie

Messenger Envelope Tablet Case


Wednesday, December 17, 2014

Party Cowl

 A Free Crochet Pattern


Are you in need of a quick last minute crochet gift. I have an easy cowl pattern for you.

I first came up with this pattern when I was asked to come up with some class ideas for when I was teaching crochet lessons at the art studio that I work at. We wanted to have some options for when students wanted to have a birthday party or shower at the studio. The idea was that each student that was participating in the party would learn how to make one strand of the cowl, then at the end of the lesson we would put it all together and give it as a gift to the host of the party.

This cowl is easy enough for a beginner and it can be worked up in any yarn or weight. There are a lot of possibilities. Each strand could be a different color or size. I am excited to see what other creative ways you can make this cowl.

Pattern

Yarn: Lion Brand: Homespun, bulky,  6.00 oz./170 g (185 yd/169 m): Cherry Blossom

Hook: size I/ 9 5.50MM

Notions: 1 button, thread, sewing needle.

Gauge: Each yo-yo is 3 in. The band is 3 inches by 12 inches.

Special stitches:

Picot: ch 4, sl st into st just made.
Joining picot: ch 2, sl st into picot of previous yo-yo, ch 2, sl st into st just made.

Notes: The cowl is made by making individual strands of yo-yos, that are formed into large loops. When you have the desired amount of strands you put them inside a band that is also crocheted.

Yo-yo strand

First yo-yo: With an adjustable ring, ch 3 (counts as the first dc here and throughout), (4 dc, picot, 10 dc, picot, 5 dc) in the adjustable ring, pull the ring tight and sl st into the first dc, for a total of 20 dc. Finish off. Weave in your ends.

2nd- 6th yo-yo: With an adjustable ring, ch 3, (4 dc, joining picot, 10 dc, picot, 5 dc) in the adjustable ring, pull the ring tight and sl st into the first dc. for a total of 20 dc. Finish off. Weave in your ends

Last yo-yo: With an adjustable ring, ch 3, (4 dc, joining picot, 10 dc, joining picot with the first yo-yo, to close up your loop, 5 dc) in the adjustable ring, pull the ring tight and sl st into the first dc. For a total of 20 dc. Finish off. Weave in your ends.

Continue making yo-yo strands till you have your desired amount. The model shown has 4 strands.


The band

Row 1: Ch 9, sc in the second ch from hook, sc in each ch across for a total of 8 sc.
Row 2: Ch 3, turn, dc in each sc across for a total of 8 dc.
Row 3: Ch 1, turn, sc in each dc across for a total of 8 sc.
Rows 4-15: Repeat rows 2 and 3.
Row 16: Repeat row 2.
Row 17: Ch 1, sc in the next 3 dc, ch 2, sk 2 dc, sc in the next 3 dc. (button hole just made.)
Row 18: Ch 3, dc in the next 2 sc, 2 dc in the ch 2 sp, 3 dc in the last 3 sc. Finish off. Weave in your ends.

Assembly

Add your button to the band using a needle and thread. Put the strand loops in the band and close the band up with the button.
More Free Crochet Patterns You Will Love

Crafty Containers

Lacy Japanese Lantern